We all adjusted to virtual or hybrid classes during the pandemic. Now that we are together again, we can still take advantage of online tools to help our students keep up with materials should they need to miss a class due to quarantine, illness, or any other circumstances. Even students that come to class can benefit from well-organized online materials and the chance to review course lectures.
Make course materials electronically accessible
You can use Moodle to share course materials with your students. If you are not yet doing this, we have some Moodle Quick Start Instructions for Faculty.
There are just a few steps to get started:
- Log into Moodle.haverford.edu
- Open your course from your Moodle Dashboard landing page.
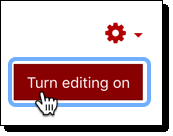
- Turn editing on
- Add files: Drag files onto the desired course section or choose the option to “Add an activity or resource” and select file.
Add web links: Choose the option to “Add an activity or resource” and select URL. - Make your course visible to students. Go to the course administration menu (
) and select edit settings. Change the visible setting to Show and then click the Save button.
Once you master these basics of posting readings and other reference materials, you can add in activities such as quizzes or group annotations. Moodle also lets you collect assignments such as homework or research papers and provide private feedback.
Record and share your class meetings
Many classrooms are set up so that it is easy to record a class session via Panopto or Zoom and post the recordings to your Moodle course. Read on to find out to record in your classrooms.
Step 1: Is your classroom already set up for quick and easy recording?
You can see what equipment your classroom has by checking our Classroom Technology web page.
Even if a classroom is not already Panopto/Zoom ready—meaning that there is a built-in room camera or advanced audio recording—there are options for recording in your classroom. You can always record via the classroom computer. IITS is happy to help you find a good recording solution that will capture what you need to record!
Step 2: Record and post to Moodle
Option 1: Record with Zoom
Recording with Zoom in your classroom is just like recording with Zoom at home. Your best option is to add the Zoom activity to your Moodle page, as well as a Panopto link. Then record your class to the cloud. This will create a copy of your video in your class Panopto folder, as well as generate a transcript of the recording.
See Using Zoom in your classes is now easier for details.
Option 2: Record with Panopto
Recording with Panopto gives you slightly more control over what you capture than recording with Zoom, but it’s not that different. If you are already familiar with Panopto, you may prefer that over recording in Zoom.
Questions?
Please email hc-techlearn@haverford.edu for help.